Friday, March 26, 2021

Yee Haw!

For the first time in more months than I can remember, I took a drive in the 914 which was at least partly just for the hell of it. For far too many months I have either avoided driving it (too cold out and heater not yet restored) or just ran to the local grocery store and back. Depending on which one the round trip was all of 18 miles max. 

 Well, once again I was out for food...seems with the COVID pandemic that is almost my only outing from the house...but this time I needed to go to one which, in theory at least, is somewhat closer...about six or seven miles. However, this might be deceptive in terms of time. While I can get to either via the state highway, between the gentle curves, potential Highway Patrol presence, and traffic, it is not always a joy and a pleasure. BUT...there is an alternative...a road named Clinton, though not for the US President of the 1990s. The name pre-dates his fame by many decades, and refers to a long defunct community which may, or may not, have been a hooch making haven in the days of Prohibition. This to takes me, as does the highway, to the town of Jackson, but a bit further south...in fact right at the cross street to the other main highway bisecting Jackson, and ending right at that grocery to where I was headed. 

 I hesitated as I left the driveway and then, what the hell, just went for it. The temperature, for the first time in months, was in the high 60s Fahrenheit, the sun was bright, there was no wind, and not a cloud in the sky. Nor was there another car going in my direction to slow me down. And so I “let the beast have its legs.” 

 Now the four cylinder 914 is hardly a powerhouse. As detailed in much earlier blog entries, with only 85 HP acceleration is not exactly a thrill, and while the top speed might exceed 105MPH the car is hardly fun or happy at that velocity. It is mildly powered VW based, roomy and practical sports car with all that meant in the late 60s. At 85 it is fun and it will cruise happily at that speed anywhere and for days at a time. But get it on a curvy road and...oh my what a different and lovely little beast it is. Corners like a slot car at speeds which are simply exhilarating. I just can't help laughing to myself as I hurtle into a 30MPH turn at 55 with just the slightest brush of the brake pedal to settle the suspension and then SNAP through it so quickly I am out almost before my brain registers that I am in. 

 And again 

 And again 

 And again. 

 The top speed I hit on this swooping, curvy, but not excessively tight road is perhaps 70-75, and most of the time I was doing five or ten under that, yet my “time to town” was probably a good three minutes faster on that route than almost anyone else would make it. Google Maps says it is 8.9 miles via Clinton Road, and that it takes 16 minutes to drive it. That is an average speed of 33 MPH. What world are they living in since the speed limit is 50? But of course almost no one can average 50 with those curves and hills. But since I make it via te highway in ten minutes driving more sedately (though that is 1.2 miles shorter, and though I did not time it, I am sure I made it in no more than that time...an average of 53.4 MPH and maybe I was even under that. At any rate it was the most fun I have had in a car since this pandemic started, including my last “on track” outing at Laguna Seca in the Siata. 

 God, I love that car.

Saturday, March 20, 2021

Above the Dirt

Still Above Ground


Odd title I guess...it actually vaguely refers back to my post called “Ashes in the Handlebars” in July of 2018. That was a “flyover” survey of the motorcycles in my life. The title was taken from a humorous(?) threat Sherri voiced about where she was going to stuff my ashes if I didn't do something with the derelict I had moved to Jackson which, 20+ years later, was lurking in a corner of my workshop.


Well, I have started “doing something,” a mechanical and cosmetic “refresh” of my favorite bike save only my X6 from the same manufacturer.


Why the title of this piece? Well, I'm 75 now...an unarguably ridiculous age to get “back into” motorcycles. But I ain't dead yet...and to paraphrase an old Datsun commercial about dogs and trucks “Marty loves bikes.”


I kept looking at the damn thing and thinking I was long past generating the energy it would take to start a large car project or even pull an engine out of one of the current classic cars I own...but bikes are a lot easier to work on since everything, in theory at least, is right out there in the open and generally accessible, though the access to some parts requires the skills of a laproscopic surgeon. It was running when I parked it, so I thought it might, like the 914, require a less than major cost or commitment to get going. Like the 914, it was part of my life since new, and bought only a few years after that car, and thus was an important part of my history, and is now, at the time of life when folks tend to do things either nostalgic or retrospective.


There was also a more practical reason to proceed, at least theoretically. I had watched two major forest fires in two years with cars were stuck in a non-moving log jam . In one case, people suffocated or burned and died: in the other, nothing was moving on a major Interstate highway other than two motorcycles. I vowed that if the worst happened and we had no warning to get out, we would have an option. While the GS750 might, at this point, be too heavy to manage, it did have a set of clip on Samsonite luggage which could be keep packed with an emergency evacuation supplies. if I could indeed still maneuver it, it also had plenty of power to get us away “two up.”


I was excited about the bike from the first article I saw for it. That was in late 1976. I don't recall the exact date when I bought it, but the month on the license plate is May so my guess would be late March or early April. That timing is interesting, as Adin was born that same year, on March 22nd .


I don't think the purchase was some sort of “Mid-life Crisis” triggered by his birth. After all, my cycling history predates that major life change by several decades, and I was riding a very nice Suzuki GT550 two-stroke at the time. I don't know exactly what triggered the decision...but can imagine aesthetics and excitement about the new model playing some part. The GT was chunky and purposeful, but the GS was svelte, and the lightly metallic blue-green paint job was particularly appealing and elegant. Not the least of the more balanced look were the four exhaust pipes, compared to the unbalanced three pipes of the GT. There was also the advantage of disc brakes at both ends compared to the drums of the GT...and the test ride articles all raved about the handling. 


At any rate, I bought what at the time I thought was the “second year model” from long defunct Selby Motors on El Camino Real in Redwood City, just north of Whipple Avenue...the building has been a pet supply store for decades. And almost 40 years later I began the project in the mid Fall of that auspicious pandemic year of 2020.


One of the interesting aspects of many restoration projects is the learning experience. The first one of these I did (the Siata) frustrated me because I wanted to race rather than wrench, but over the years I have learned to make the journey more pleasant by simply relaxing and letting things proceed at their own pace rather than trying to rush to an arbitrary deadline. That rarely works out well at all. If nothing else, parts acquisition depends on research, availability, and supply issues which are often beyond the control of the builder or vendor. There is little sense in getting frustrated while waiting for a critical part to show up.


After surveying and analyzing the condition of the GS, I spent weeks “doing my homework” to determine that all the parts I thought I would need appeared to be available. In reality though, just because those parts were listed on one or more sites did NOT mean they were a stocked item, nor that they might have to be special ordered from Japan, nor even that they were still being built or in existence anywhere on the planet.. But the Internet is the greatest research tool in history, and how much longer and more frustrating the search would have been without the information residing there.


In addition to parts suppliers there are usually one or more user forums with communities of folks with similar machinery...and these are often good sources to learn of suppliers or techniques and problem solving approaches. Of course, there is also plenty of inaccurate, misleading, and just plain wrong material out there as well, and it takes some critical analysis to separate out reliable information from noise...but this is also true in face-to-face evaluations of people and businesses. 


As I poked around I found some information about the model which was enlightening, and some which was and remains confused and costly in time and/or money. 


Though the GS came out in 76, I learned that all bikes built in that year as well as in 77 are considered 1977 models...and that they are not all the same. I kept running across material listing the “1977 Suzuki GS750”...as well as other 77 models with a letter suffix, the lowest and presumably earliest of which seemed to be a “1977 Suzuki GS750B” variant. All the sites supplying OEM parts, until recently, would pull up diagrams purporting to apply to the “B” version, whether or not I specified that in my search terms.  


.
 But at some point these sites have dropped the “1977 GS750” non-lettered menu selection.


I have the original owner's manual as well as an original factory service manual purchased with the bike. These make no reference to this “B” suffix. That led me to the builder's plate on the steering head frame tube. This contains not only the model and VIN number but also the build date for the bike. The model number on that plate is simply “GS750” without a suffix. 


Interestingly, in only one place have I seen a reference to an “A” version, and this chart is blank for the “A” column and GS750 model, nor does it list a “GS750B” on the left side. 


More searching led me to this site, put up but apparently no longer maintained, by a fellow in Scandinavia:https://www.suzukicycles.org/GS-series/index.html. It is a comprehensive listing of all Suzuki variants of the GS750 and other models, though it is not free of some conflicting and confusing information: Of particular interest to me was the date the model was publicly unveiled (October 1976), and that by January of 1977 it had already changed in specification.


The original GS had, as mine does, a single front disc brake using a floating single piston caliper, and spoked (wire) wheels. But twin discs apparently became standard issue by January of 1977, and alloy wheels were also standard on the “E” version by February of 1978. Supposedly the non lettered model was still available at that point, with twin discs and wires. 


So, according to this site, mine was built in 1976 even though I purchased it in the mid-Spring of 1977? Indeed. Though I never recall doing so before, I looked at the serial number plate fastened to the steering neck on the frame of the bike. And there found not only that serial number, but a build date...of September 1976, the month before the public announcement!

Pre-printed year plate with stamped month


There is something else revealing about this plate. The year is silkscreened or otherwise pre-printed on it. Only the month of the build and the serial number are stamped into the metal. This means, of course, that this plate was only used in 1976. No bike built in 77 would have it. Not only is mine, quite unexpectedly, a 1976 bike (though all such are considered 1977 models), but it was built before the public unveiling and is thus one of the very earliest GS750s. And a very gutsy move by Suzuki. They gambled from the beginning that the model would be successful!


I have yet to find a key to deciphering the serial number. Mine is 14677, but the leading digit might indicate, as it does on my Porsche, the model year. Perhaps my bike is the 4677th GS750 built? Of how many? I have no idea and have found no list of production volume. At any rate, it represents my own willingness to “gamble” on a very early new model, though I did not know at the time exactly how early it was. 


Then there's the paint, or more precisely, the color. My research located a site able to supply the correct colored vinyl striping for the fuel tank and rear valance over the fender and tail light. The tank and valance are the only painted bits on the bike other than the frame. The site lists and shows three different colors for1977...a red, an orange, and my own bike's more refined and subtle slightly metallic blue green. I have absolutely no memory of seeing anything BUT that color...was I just “blinded by the light?” Did Selby not have another color in stock? I have no idea. 


Fortunately I did my homework and did not just order paint from the first, indeed the only, place I could find claiming to be able to supply the “Potomac Blue,” which is the name Suzuki used. 


I plowed around bike forums where others were struggling with the same issue of trying to identify the color and mixing codes for the paint. I viewed so much material that I'm not sure, but perhaps it was on one of these where I found that name. In looking at photos online it seemed to me that many of them were “too blue,”  but thought perhaps it was problems of color fidelity of films, digital photos, lighting, and screens. I have seen this in many other photos after decades in serious amateur photography.

Too Blue...Eu or UK version?


But this was not the case this time. I found another place where the Suzuki “paint numbers” were listed, including links to OEM supply sites. Usually, with these codes in hand, any paint shop can access the specific mixing formulae. That was true with the 914 as well as Adin's Sprite, but these were large production run vehicles from major European automotive manufacturers, not a smaller production run of motorcycles from a firm in Asia.


Turns out it was well that I kept probing. I had found only one shop which claimed to be able to match the paint with the mixing codes they had. Phil at RS Motorbike Paint in the UK was both understanding and helpful. Once we realized what he had was called “03J” and the code I needed was “03E,” even though the name might have matched the color would not. We guess that these colors were not only unique to the 1977 model year, but that the difference might be between the color as used in the US versus the UK. Thus the “too blue” bike in the photo. 


I also learned to not automatically trust the diagrams which, though obviously supplied by the factory (and used by ALL OEM suppliers), are not necessarily correct for my bike. Here's an example. When Suzuki went to dual front discs they obviously needed a front master cylinder with a different internal diameter than that needed for the original single disc model. After getting a very expensive rebuild kit for a “1977 GS750” I learned the hard way that the ID of my cylinder was bigger than the seals and piston supplied in this kit. Since there does not seem to be much knowledge out there about the “pre B” or “A” version of the GS and the differences between them, at least some parts for the “B” simply will not work. 


In addition, I have learned to look very closely at those factory diagrams and the associated part numbers. If the numbers are identical between the “B” and other 1977 variants I learned that the part might well be for the other models. Even with different part numbers, since my bike is an “A” and the earliest parts described are for the 77 “B,” that part might well not work. While there are few differences between the variants, the ones which exist are non-trivial. 


The diagrams also need to be viewed closely. For example, the front brake calipers and forks for the “B” shown online shows a single front disc, which does not match other information I have about the model. 


Though I did not expect it, Ebay became a highly utilitarian source for some items. But no matter the source, figuring out dimensions was an issue. These are only rarely provided, and it is really hard to figure out if a non-OEM part would fit from a non-dimensioned photo. 


No matter where the part or fitting comes from, not being able to use it pushes any planned scheduling into a crap shoot. I'm not in a hurry with the project, though returning items to Amazon is as easy as it gets but is still a delay and inconvenient, and things just get less easy from there with other suppliers (oddly, Ebay in many instances is as easy as Amazon). And sometimes, with a $15 part and no free return shipping, it just doesn't pay to send it back. I have a shelf full of stuff like that now.


An interesting side note is how much has to be sourced outside the US, and how much of that, including custom manufactured replacement parts such as these fuel intake manifold pieces 

Fuel manifold pieces   

 come from the UK. Though I have known for years that this original source of the Industrial Revolution is still a nation of small “fiddlers” and “makers” it still seems crazy to me that it is also a hotbed of OEM and aftermarket replacement parts for Japanese bikes which are now close to a half century old. While I was able to use my original manifold pieces and did not order the ones shown, I have bought two items out of England, with a third to be purchased shortly, as I move from completing the mechanical work to replacing cosmetic pieces.


The side covers have a GS750 plastic emblem above the “Suzuki Motors Ltd.” decal, as can be seen this photo of the cover.


 For 1976 the “GS” was in silver, with other 77 versions using gold. That gold version might also have been used for some time (I did not check) as this version is readily available from OEM as well as Ebay sellers. ">Not so for the silver variant. None of the OEM suppliers I viewed showed it as available, and I only found one pair on Ebay from (you guess it) England. Since I am trying to keep the bike as close to original as possible, I was not interested in the gold version. The dilemma was that I dropped the bike once approaching the China Basin bridge and lost the emblem from the left over. Otherwise I would have just kept the old ones in place or perhaps would have settled for buying the (much less costly) gold ones.


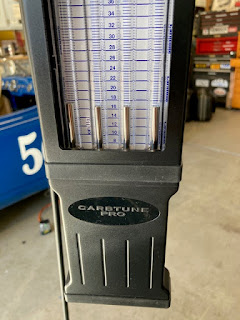
The next UK purchase was a tool for synchronizing the four carbs. In the 70s I used a rather crude device consisting of a masonite board with lines penned across a painted white background at set intervals. There were four glass or plastic tubes transecting these lines and glued to the masonite. Attached to each was a long surgical rubber hose. Each tube had a bit of mercury in it. I guess there were fittings with the setup to attach the hoses to which screwed into the intake of the carbs, normally covered by allen head screws, but I really don't recall. 


The concept was that with the bike running at a high idle, you adjusted each carb so that the height the mercury reached for three cylinders matched that of the highest column for any. I assume it worked well, though spilling mercury or worse, sucking it into the motor, was a concern.


This thing eventually deteriorated to the point it was no longer usable. Heat turned the hoses to mush, and the mercury did eventually escape. Though the bike is now running, this photo of the 36 year old plugs I was using to get it going show clearly that, from left to right, the #1 and #2 cylinders are clearly running significantly richer than #3 and #4. 

Numbered from Left to Right


There are two systems available today for tuning. One uses circular vacuum gauges, hoses, and carb adapters. The gauges are fastened to a metal “board.” The other uses either a column of some liquid less toxic than mercury, or in the case of the most costly version which reviewers said was the best, lightweight metal cylinders, within tubes calibrated against a marked scale, but functioning like that crude 1977. Both the gauge and tube type are available from sellers on Amazon. I also stumbled across a site with links to the supplier of the “best version” (the one with the metal cylinders) for less money, shipped direct from the manufacturer in...Northern Ireland!

Before: Out of Synch

In Synch After Adjustments


Some of the chrome on the bike is sadly deteriorated.I can live with some of this to keep cost down, but the front fender in particular is too visible and important to just leave “as is.” So assuming a replacement was available, should I repair and rechrome mine, or should I replace it? The OEM sellers do not sell new fenders, so I investigated costs of repair.. For the luggage rack there would be no alternative to repair, as the unit was made by Samsonite and is no longer available anywhereI t consists of eight tubular parts and the cost was too high to contemplate, so I used a rust remover and ultra-fine steel wool to clean it as best I could, touched up some small spots with silver paint, and then clear coated it with high quality gloss brake caliper paint.


The quote I got for repairing my fender was almost exactly the price of the new one I found in (wait for it)...England. It is hard to judge the quality of a chrome shop sot I am opting for replacement. This seller too was in the UK and I seem to be making a lot of new friends in the UK there.


I suspect it is long past time to end this missive as it is turning into a doctoral dissertation instead of a blog post. So here is a photo of the bike as it sits today (sans luggage, which is off to allow access to mechanical bits). The lower front forks will be repainted with the same silver as the motor. Photos usually make things look better than they are, and though that is true here, the picture is not totally misleading. I wish I had some shots taken before I started, but the one below of an engine cover provides some feeling for the rather sad state the GS was in last October. It's come a long way, baby. 

Before: Peeling Paint and Corroded Side Cover

As She Looks Currently, though far from completed


Thursday, June 4, 2020

The Sierra Nothern Empire II: A Journey Along the Line

The Sierra Northern Empire II
A Journey Along the Line

The lower level of my layout represents a fictional joint operation of the Southern Pacific (SP) and the Atchison, Topeka, and Santa Fe (ATSF), called the “Golden State” Division. The tracks run east from “San Francisco” and terminate at “Riverbank. 

The “Golden State” Division


As may be seen in this photograph, 
after 20 years “San Francisco is barely under way, and the tracks were laid only within the last five years. Prior to that operation was done by “five finger fiddling...” lifting cars up and putting them on Sharpie lines where the yard tracks would later be placed.

With places to store, classify, and make cars up into trains there also is a turntable and roundhouses at the far end with capacity for many locomotives. There are also three major industries represented by reduced profile buildings: a tin can manufacturer, a box company, and two buildings of the “Fritts Fine Foods” facility, named for a deceased friend. This firm takes food products from other industries along the line, does some processing for local truck distribution and uses boxes and cans from the other two local factories. It also sends food to other line industries, including a freight forwarder in Jamestown. Thus one industrial site provides  much interaction with several others on the layout, providing for many car movements.

The backdrop will ultimately contain a reduced profile terminal, perhaps represented by a print on the backdrop. The first two tracks along this part of the yard ( at left) are for passenger service. At the far right rear of the yard is a container facility. This and the all diesel Golden State division is not “period correct” for the mid-1950s era of the layout, but it's my layout...I get to violate reality!

From the far end the line then goes uphill to “Manteca,” a San Joaquin Valley agricultural town which contains two grain elevator companies, a winery, a large produce and farm product company, and ice houses to service refrigerated cars. The buildings in place in the photo are those which will be used and are in the places they will occupy after construction, but there is much to be done here. 
Station and ice house beyond
One of Valley farms buildings and siding at high
San Jouquin Winery at upper left
Siding at left continues to two granaries


I now have what are termed “essential hand tremors.”. As I told my neurologist, if they are so “essential,” you take them! These make working in 1/160 size frustrating. Hopefully I will just take a deep breath and dive in soon, but for the last few years have hesitated to make the attempt. But hey..constructing the backdrop and landscaping is one of the least meticulous tasks of model railroading, so...

From “Manteca” the line crosses the lower “bridge,” which is a dropdown representing a causeway, to enter “Riverbank.”  Here there is a roundhouse and outside
storage tracks for engines too long to fit that building or which cannot be turned on the short turntable. There are fueling and water towers as well. The yard tracks allow flexible engine movements and train classification and car storage, display of a “Maintenance of Way” work train, joint passenger and freight platforms, and other features. There are no specific industries here, but presumably a number served by truck which are “off scene.”
Riverbank" HQ of the Sierra Northern Railroad
Interchange with the Golden State
Showcase Terminal just beyond hill;
A "Mendicki" tribute to the Yosemtie Valley Merced Station

The “Sierra Northern” Mainline


Golden State trains do not go past this point, and from here east it is all steam. Sierra Northern trains leaving “Riverbank” only go east, towards the tunnel and then onto the lower peninsula level, emerging from the tunnel to enter the elevator track.
Tunnel from Riverbank
Elevator just beyond lower edge of photo
Turn From here they are raised to the second level. They back off the elevator track, go through the center backdrop, and emerge under the overpass on the other side, which is on the peninsula at “Jamestown.” To enter the station and yard facilities the train backs past the switch at the far east side of town. The switch is then thrown to select the tracks going towards “Jamestown” station. 


This town is the heart of and center of action.  Not only are there six industries here, there is an interchange yard for cars headed “up the hill” on the Angels Branch, with a roundhouse and turntable for moving the smaller and lighter locos which are needed for this steep line. All trains headed further east on the mainline require the engine and caboose to be reversed and run around the train, in order to be pointed forward for departure. 
Jamestown: "Economic Powerhouse" for the SNRR
Partial View from west end of town

Industries at “Jamestown” are a brewery, a motorcycle parts distributor, a farm and feed supply firm, a hardware company specializing in mining and timbering supplies, a freight transfer firm, and a cannery. Each creates or uses products which interact with other businesses on the line.
Central Jamestown
Superior Transfer in foreground


Mainline trains continue on their journey, running off the peninsula and into Sonora, on the outside wall of the room. Perhaps it was the real oil wholesaler on the Sierra which caused me to make this industry key to the town, but why I made it not only the sole industry but represented by three separate facilities is a mystery. But there it is. 
Downtown Sonora
Oil Facilities at Sonora
Crossing the higher bridge (the “liftout”) brings the train to “Tuolomne,” the fnal stop and terminal on the SNRR. The bridge crosses the New Melones reservoir. Though what I lifted this idea from the Yosemite Valley RR, but I don't at the moment recall the exact and famous name of that bridge nor its location (NB CHECK!)

“Tuolomne's” sole reason to exist, on either the layout or for real, was the timber industry. My version includes a dump track into a pond, from where logs are floated to a sawmill. After cutting, lumber,goes to the drying building, and after aging is shipped out to various buyers both on and off the line, including the cannery and box companies. There also is a chipper, which ships waste for processing into other products somewhere. Of course, since this is the end of the line, there must be both a small engine house and a turntable to reverse locos for a return trip west to “Riverbank.” The tunnel at the far end of town is a dead end representing the Sugar Pine or another lumber company line which ran from the town.
Partial View of Tuolomne
Pickering Lumber Facility
Base of Chipper Tower at Right
Log dump beyond Pickering Locos
Foreground track is continuous run bypass

So where does the supply of logs for this mill come from? Ah...that is one of the functions of the branch line.
Pickering Drying shed
To east of photo above
Creek to log pond
SP AC12 and train on continuos run track

The “Angels Branch”

Like the real Sierra Railroad, the SNRR has a branch line running uphill from “Jamestown “to “Angels Camp”, though the SRR abandoned the line, in 1928 I believe. To allow carrying an extra car on a train and for the safety rules of the railroad, trains on the branch do not use a caboose...the conductor and brakeman crowd into the loco cab with the operating crew. 
The “safety rule” is that without a turning facility at “Angels,” the trains run with the locomotive leading on the uphill run, but with it at the rear going downhill. This protects the crew if the cars should break loose and become runaways, since they cannot push the engine down with them. The real reason for this on this model is the limitation imposed by the length of the elevator track. 
An “Angels” branch run, assembled from cars which were spotted in the interchange yard at the east end of “Jamestown,” enters the elevator by backing west, under the auto overpass and through the backdrop. Unlike trains from “Riverbank,” this time the upper elevator track is used, moving the train from level 2 to level 3. 
Exiting the elevator the run first services the long spur to the New Melones Gold mine. The importance of this industry is evidenced by the fact that no other industries are on this spur. The mine uses short ore cars for the rich gold containing rock, bound uphill for processing in Angels, and longer hoppers to take away tailings for ballast or gravel for other uses...bound downhill to “Riverbank” or on to “SF.”A spur can only be serviced from one direction, in this case uphill, but since a our train runs “backwards” from “Angels” on a downhill leg, we can service this spur from both directions.
New Melones Gold Mine and Spur

The next stop is “the logging “Camp 16” of the Pickering Lumber Company. While the real Pickering operation was at Standard, between Sonora and Tuolomne I have used “modeler's license” to put it on the branch.  
Switchback track
From NMGM to Camp 16 and Angels
Logs dragged to the spur by steam powered sleds called “donkeys” (one is in the foreground of the photo) are loaded onto special log cars or into gondolas for transport to the lumber mill at “Tuolomne.” I've used more “modeler's license” here too, as the actual mill was at Jamestown. 
From “Camp 16” it is a fairly long, steep climb to the terminal at “Angels,” with another gold mine, the “Jumping Frog,” a general merchandise “team track,” and two long spurs in the foreground  representing the actual gold processing facility. To avoid blocking access to the rest of the town I may represent this industry on a backdrop the sidings seem to continue into, with perhaps a reduced profile building on the backdrop. To this point I have resisted hiding the ends of the layout with backdrops in order to allow visitors to see the entire scene without the risk to the system implicit in the duck-unders and very narrow aisles.
A final note: The reality of N scale is that the more complex wheels and rods of steam engines makes them perform less than satisfactorily for local switching of cars. So I have retained early diesel units for this use. The exceptions are particular steam engines which do manage to perform well in this use.
So that is the “Sierra Northern” railroad empire. It is my third system of that name. One never got very far as it was in our garage above the car, a terrible environment for N scale, which is very sensitive to dust and dirt. It was also an overly complex published design with lots of hidden track-a recipe for trouble. The second was a small layout operated from a central pit which when not in use, was raised to “live” overhead in our guest bedroom. This current version, likely my last, is both much more extensive than the last, and much more practical and reliable than the first. 
Now if I can only work up my resolve to get back to work and operating it!

Friday, May 8, 2020

The Sierra Northern Empire

I have mentioned my model railroad before (Planes, Trains, and Automobiles). I'd like to talk about it more here.

Plans for our new home included an outbuilding for “hobbies,” with a washroom, railroad room, and darkroom along one side, but the builders did not follow my plans for the rooms. The washroom was reached through the railroad room. While this initial construction, shown below in Diagram 1, was ok at first, a lot of space is needed for access to the bathroom. The needed aisle space could not be blocked. This became an issue later. 
Access to bathroom and railroad room require two aisles
as well as one of them being the length of the room

In my earlier post I noted that Ernie Mendicki was more than a car mentor...he was also a master modeler with his own N scale empire. Gary Winiger put the two of us together about modeling when he realized that Ernie and I worked in the same tiny scale.

Ernie's actual layout was more “toy train” than “railroad empire.” He did not built it for operations, and was content to watch steam trains run just to see them in motion. His buildings are in a different world of realism and detail. They are stunning, whether scratch built or from commercial kits. He had skill, vision, patience, and dexterity completely at odds with his large body and hands.

My interest in N scale rekindled Ernie's passion and he quickly got back into building by creating a scaled-down tribute to the small cannery on his street, replaced years ago by condos. 
Ernie's Cannery Model at Jamestown
An imporant online industry
Served by a dedicated double tracked spur

Ernie willed his railroad to me. Though I was glad to accept this recognition, I did not take it seriously. Ernie was seven years older than me but I expected him to be around for many more years...decades even; A month after his 61st birthday he was gone.

It was easy to get the modeling tools, structures, and rolling stock, but the layout created a dilemma. It had miles of track and 40+ track switches. But to use all of this I was going to have to make some changes and expansions. At first I thought I could move his table and blend and connect it to mine, but could not figure out a way to do this that I liked. Then I looked more closely at my railroad room...and realized that the the door into the room and to the washroom wasted a huge amount of space for the access aisles. There was a solution that freed up a lot of it. If I moved two of the doors I could access both of those rooms with a single, short aisle. The washroom would be entered from the shop, and if I moved the door to the railroad room to the end of that room nearest the darkroom I could recover almost all of it. 
Revised post-2000 floorpan
Bathroom access directly from shop
Single short aisle for darkroom access
Maximized usable space

Drawing is one thing, building is another. The changes were minor, but the rebuild took time. As did tearing Ernie's layout apart, removing the track and switches, and disposing of the remains of the table. Even as I was working on both tasks as well as dismantling my own layout, I began to plan for the new “empire.” By the time I finished the reconfiguration I had the design pretty well worked out.

I had resolved to not repeat prior mistakes, and eliminated virtually all hidden track. I also increased the chance for success by doing scale drawings...whether or not I used a plan from a book or made my own. The first one was ¼ size. The volume of gear I had suddenly inherited, as well as my pent-up and long standing desires, favored an extensive layout...and suddenly I had space for it. 1:160 allows lots of railroading in 8 by 12 feet. I wanted an “around the wall” setup I could operate from the center, thus being surrounded by my “empire.” But I also realized that, with some compromise possible because of my own modest size, I could also squeeze in a central peninsula with two very narrow side aisles of about 24” width. If I built a multi-level setup I could have quite a bit of railroading indeed.

How do you move trains between the levels if I did that? One way is to hide a helix of track within a corner “mountain.” A helix is nothing more than the shape of a spring with the radius of the track, and with the number of “coils” required to get between the levels using the slope the equipment can handle.

There are problems with this approach. The train spends a lot of time out of sight running around hidden track...not very appealing either visually or if derailments occur within the compressed separation between the coils. The helix also takes up a lot of real estate. You wind up with a very unrealistic topless “mountain” which on my layout would occupy an area of about 16”x16”.

One of my reference books showed use of an elevator to move trains between levels. The length of the elevator track would match the longest train.For the short trains I wanted for reliability and compatibility with the space I had, this amounted to a an area of 2”x36”...a saving of over 70% of the area versus a helix. Of course there would be complexity in terms of figuring out how to engineer a reliable elevator, but I put that aside for the moment and began to draw.

I developed an exciting plan containing eight towns or industrial complexes including three major storage/interchange yards, on three levels. Why stop with two levels when there was space for more? Of course this would mean a compromise to operate. The mid-level would be the main source of action and I wanted this to be close to eye-level for visual realism. With any rational distance between levels this put the lower level above my waist height, which was workable, but the upper level is well above eye-level...how would I operate this? Since I planned this as a branch operation I thought I could out answer that later without risking something unworkable. I eventually decided to use small step stools. I needed to allow space for a large display cabinet from Ernie's railroad room on one wall, so I simplified this level to use only a central peninsula and two walls.

The layout, like a number of my earlier versions, is a tribute to the Sierra Railroad (now called “Railtown 1890”) in Jamestown, California. I wanted a main yard on the lower level (“Riverbank”) which is the interchange between my Sierra Northern and a mainline, westbound, combined ATSF/SP link running through a Central Valley farm town (“Manteca”) to a Bay Area terminal (“SF”). The “Riverbank” yard is shared between the SNRR and the ATSF/SP. Via the elevator the SNRR goes east to a second and wholly-owned yard at “Jamestown.” This yard includes an interchange to the branch line on the third level, representing the real SRR branch to Angels Camp. From “Jamestown” the mainline tracks continue east through “Sonora” to terminate at “Tuolomne.”

Each of the lower two levels includes a bypass track which creates a continuous loop for display purposes...so I can entertain people by letting them watch trains run around without me doing anything. From “SF, ”instead of going east to Manteca, a train can connect on one of the few hidden tracks directly west to Riverbank. In like manner a train from “Jamestown” can connect directly to a bypass track running on a small ridge next to “Tuolomne” and then to “Sonora” and on again to “Jamestown.”

In order to avoid ducking under the layout to get into the operating area I included two bridges...a removable one connecting “Sonora” to “Tuolomne” and on the lower level, a “swing down” version connecting “Manteca” to “Riverbank.” Neither of these has worked very well so I may replace them with permanent versions.

The Angels Branch is accessed via the elevator. Using switchback tracks, after servicing the “New Melones Mine” the trains reaches the Pickering Lumber “Camp 16” and finally terminates at Angels.

The “Jamestown” and “SF” yards are on the peninsulas, while the “Riverbank” yard and the smaller terminal at “Tuolomne” are along one wall. 

Modeling uses“selective compression” and other visual tricks to make things seem more larger. For example, a small country railroad station 160 feet long would be one foot in N scale, which is still too large for most home layouts. Shortening the passenger platform, shrinking the waiting room, and eliminating two of the three freight doors allows a reasonable representation of the station in perhaps four inches. By compressing other details, angling items to create “forced perspective,” and other tricks, the eight feet of the “Riverbank” yard is made to look much larger than it really is.My ¼ scale plan used these techniques, drawing upon decades of learning and building. 
Partial view of "Riverbank"
Note building scene on backdrop
and reduced depth structures.


The plan includes large and active scenes with many industries, allowing the extensive and realistic railroad operations that have always interested me. Otherwise what do you do with a layout once it is built? Running trains around with no purpose is not appealing, but the puzzle solving of railroad movements (how do I get car “A” to industry “B” on siding “C”?) are interesting and challenging.

The ¼ scale plan came together quickly. Either I was lucky or had absorbed a lot over the years. But I knew small errors in ¼ scale are not so small in full size, so for the first time I did a full size drawing.

I made templates from masonite for the curves, building in easements based on a technique from a magazine article. The templates had profile notches for the small and medium radius switches I had (modelers call these “turnouts” to distinguish them from electrical switches). These templates would also be used to lay out centerlines of the actual tracks during construction.

I drew the plan on roll paper, which was used for reference during construction...I still have at least parts of both the ¼ and full scale plans, and the actual tracks vary very little from these. The full size drawing confirmed that all clearances and trackage were workable, and included some ideas of various building sizes to be used as well as how electrical sections of track would be isolated and controlled by individual switches (“blocks”), which allows multiple engines to be on the layout at the same time. Today this is all done with computerized signals sent through the rails to decoders in the locomotives, but the gear I have pre-dates this enhancement. I was not about to delve into modifying earlier engines to install the needed tiny components. My result is overly complicated wiring and control panels in each “town,” but I stuck with what was comfortable. Building the layout and laying the tracks would be complicated enough.

I wanted something easy to work with and environmentally stable for the tables. A contractor friend suggested I use steel “2x4 studs. These are rigid but surprisingly easy to cut and connect with self-tapping sheet metal screws. Within a short time I had built all the benchwork I needed.

The peninsula benchwork rests on the floor. Each peninsula is connected to the one below by steel risers, while the bottom one (“SF”) sits on legs. The “round the wall” benchwork is supported on metal shelf brackets. These as well as the side rails of the benches are screwed directly to the wood studs of the walls. The result is a rigid structure which is dimensionally stable and overkill in terms of the strength. 
Channel steel benchwork
Wood risers
Homasote roadbed and scenery foundation
Unfinished town of "Manteca"

I used a product called Homasote for the base of the tracks and most scenery. There were a number of factors behind this decision. A multi-level layout can't allow much elevation rise from the lower level(s) before the tracks approach the bottom of the level above. This is a visual interference as well as a possible technical one. I also wanted to minimize the amount of open construction, which requires screen wire and plaster or foam carving to represent hills and land contours. For the most part I wanted the land to be level with the tracks. This makes siting buildings easy, but also brings the tracks into better scale. Instead of mounting the rails to cork or other roadbed material which would then be laid on a sub-roadbed, putting the rail right on the base minimized the height of the rails and greatly simplified building. 

Homasote is made from recycled paper compressed under high temperature and bonded with adhesive. With adequate support it does not sag, reduces sound transfer, is easily cut and shaped, and provides a good foundation for track mounting, ballast gluing, painting and other scenery detail. I had used it before and while not suited, unsupported, for heavier train scales, it is an excellent material for N. I simply drew the track layout on the Homasote with a Sharpie and then cut where required, fastening the material at the needed height above the benchwork with wood risers spaced at roughly 8-12 inch intervals. The result was solid foundations for all the towns and yards.

The elevator track has to move vertically from the bottom level all the way to the third level. At each level the elevator track has to “register” accurately in both the horizontal and vertical planes or the train will derail moving either on or off the elevator. Neither problem has an immediately intuitive solution, though the vertical registration is easier to solve.

Full extension drawer glides consist of a rail riding on ball bearing inside a metal “track.” The track is normally fastened to the cabinet and the glides to the bottom of the drawer. I mounted the drawer tracks vertically and fastened a solid board across them as the base for the elevator track. I fastened the drawer tracks to vertical metal studs, being sure they were themselves aligned, using a level. Because of the limitations on available glides in my local hardware store I needed to use two separate foundation boards. One moves a train going from “Riverbank” to “Jamestown” (level 1 to level 2) and the board mounted higher up on the moves a train from “Jamestown” to the “Angels” branch line (level 2 to level 3).
Lower elevator track showing approach track from "Riverbank"
Temporary lighting
Note vertical registration pin below track

I made a metal pin ito insert in a hole in the metal stud for vertical registration for each level. I needed some adjustability for perfect alignment, so I welded a washer off center to the pin as a cam which can be rotated to slightly move the elevator track up or down as needed. 
Closeup of vertical registration pin
Locator hole in vertical channel
behind backdrop

With N scale there is not much “room for error “A difference of 1/64” between the elevator and the mating track is the difference between smooth movement and derailment. The cam system ensures accurate vertical mating.

Horizontal alignment was a more difficult problem. Drawer glides are not made to be mounted or used vertically. The weight of the drawer is actually part of the way the glide is retained within its track. When mounted vertically the glide can “wiggle” a bit, and in addition some of the ball bearings actually escaped the track, adding to the “wiggle.” I needed to fasten horizontal registration guides on the mating track sides of the Homasote to align correctly in that plane. 
Horizontal registration plate
Elevator on right
Approach track on left
The resulting system is not perfect, but with care it is workable. A counterweight helps smooth out the movement of the elevator to ensure the train stays on the track.

To keep my interest up I laid all track with the exception of “SF” right after installing the benchwork and Homasote. I had planned control panels for each town and envisioned operation by two or more people...ridiculously ambitious with aisles which are so narrow-as little as 21” in some places. I later gave up the idea of multiple throttles and control points, but by then had installed very complex and crowded wiring which is difficult to debug when things go wrong, as they inevitably do. Maybe one day I will get around to figuring out a way to refine and simplify this.

I wanted the layout to look as realistic as possible and to showcase Ernie's models. I also wanted to use all I could from both my old layout and his...track switches are costly and there are something like 100 on the line. Many originally had large and unrealistic electromagnetic switches permanently mounted next to the “turnout.” These are almost as large as the entire turnout! I carefully cut them off and used control switches invisibly mounted under the Homasote. Other turnouts are spring loaded and offer positive manual control just by pushing on them.

I use commercial software to generate realistic traffic movements between industries for each location, I had much enjoyment even before “landscaping” each town with paint, colored foam or sawdust “vegetation,” and a variety of trees. I put in roads, cars, and miniature “citizens”- there are 41 in “Riverbank” alone- and after about ten years the following towns are complete, to the extent that anything on a layout really is-”Riverbank, Jamestown, Sonora, and Tuolomne.” The layout of other towns is done, and the only trackage and control panels still to go is the huge yard at “SF.”

The layout has major turntables and engine facilities at “Riverbank” and “SF” and smaller ones at “Jamestown” and “Tuolomne.” Industries include a logging at “Camp 16” with a processing sawmill and lumber facility at “Tuolomne” and others such as the cannery at “Jamestown” and the farms at “Manteca” as well as the food wholesaler at “SF.” By planning these interactions into the software I created a realistic set of operational moves across the branch and mainlines of the Sierra Northern as well as the interchange with the ATSF/SP.

It is difficult to get a sense of the entire line from verbal descriptions, so here is a basic sketch of the layout. hen the train is raised from the lower level to the middle level (from “Riverbank” to “Jamestown”) access to “Jamestown” is by backing up past the track switch marked “x” on the drawing. This is consistent with the Sierra Railroad's operation in “the real world.”
The connector tracks at the left
are for continuous loop operation only
for demonstrations and are not used for operation

There is always something to do or build to keep me busy. My only concern as I age is what my back issues and declining eyesight and dexterity will allow with this tiny system. But even if I never touched it again it has added immeasurably to my enjoyment over the years. 

My next blog entry will simulate a journey along the line.


Thursday, April 2, 2020

15 Minutes of Fame...Many Times Over

I'm not a big time racer...I'm not even a small time amateur. Not in “real” racing, not in vintage racing. Heck, in 35 years I did a rough computation and concluded I had less than 6000 miles in high speed competition events, including Ferrari Club track days on road courses, vintage racing in wheel-to-wheel action on the same, a few “repeat performances” in a single closed course hillclimb event, and a few high speed tours for display or demonstration purposes. 

By comparison, in an equally rough calculation, I figured a Formula 1 driver does that much or more in a single season.

Still, I have had more than my share of “Walter Mitty-like” dream experiences. I believe that, including configuration changes made to some tracks over the years, I have driven at racing speeds on at least 19 different paths. This includes two Sears Point configurations, at least three different Laguna Seca variations, two courses at Coronado Naval Air Station, and two at both Thunderhill and Watkins Glen (though one of the latter was a “demonstration” on the original street course), as well as multiple times at most, including the hillclimb.

Two of these race weekends were at tracks which no longer exist: Fernley, Nevada and, more importantly, Riverside Raceway. Three were on temporary airport courses which were reminiscent of “the way things were” for a lot of races run in the 1950s in the US. Two were on a temporary course set up in a hotel parking lot.

I have driven four cars in these events...the Ferrari, the Siata of course, the Quantum, and the MGB I share with my son. I've been on two of these tracks many, many times and in all three cars. Sears Point was the most “local” for the many years I lived in San Carlos, yet I have always called Laguna my “home track.” I've probably spoken about that in other posts, so I'll not delve into the reasons again here. But Laguna is beautiful and iconic, and as famous a place as any race track in the world, so I count my time there as something very special.

And I love Thunderhill...it is truly a track made for the enjoyment of drivers rather than as a money maker a business or a venue trying to please spectators.

Running at Riverside was another high point...another famous track which is now just a memory.

While most of the events were and remain club affairs not open to the general public, Coronado, the various “Wine Country” events at Sears, the Reno Hilton parking lot races, the Watkins Glen street course “demonstration” and display, the run to and display in Sonoma, and especially the popular and also iconic Monterey Historic races at Laguna, were all run in front of the public...the latter with as many as 60,000 plus spectators as the event gained in prestige and popularity.

And, of course, Pebble Beach, though not a race, was an honor...simply having the car on display at one of the very top car shows in the world. I add that as, in reality, I think this blog entry is really about what I have begun to call my “15 Minutes of Fame, Many Times Over.”

I don't kid myself about either my capabilities, or the Siata's. It is a tiny car, with a tiny motor, going at rates today that are 20% faster than it ever did when it was competing “for real.” And though in the early days of vintage racing I was quite successful dicing with many other cars in my grid, finishing as high as 10th of 25 or so cars at Monterey and 7th at the Wine Country, as the sport grew and bigger and quicker cars became the norm I marched steadily backwards in the pack, though I was going no slower. These days I generally run around alone, still turning 2:21 on the 2.23 miles and 12 turns at Laguna, watching my mirrors constantly for cars with engines of two to five liter displacement or more as they come screaming up...and by. 

Yet I have been recognized for my performance, but more for the beauty, preparation, and history of the car, on at least four occasions. In the early years trophies and awards were more for the cars than the drivers...no one got one for “winning” a vintage race, even at Monterey. The recognition was for restoration, preservation, and demonstration of cars whose history spoke for themselves, and could not be further enhanced by our amateur and “johnnie come lately” driving skills.

Though that has changed (unfortunately in my opinion) and there is much more “Walter Mitty-like 'heroism'” these days, there still seems to be a place for those of us who continue to participate while maintaining those earlier attitudes. This continuity is encouraging.

The first and second of my “special” and personal awards were judgments made by someone whose contribution to the sport is at the highest level. I first met Steve Earle just about the time he was starting the Monterey Historic Automobile Races...before he even had a logo for the event. The context was the Ferrari Owners Club, where we were both members, as are many of the people I still race with today. In fact, if not for ticket sales to the California chapters of the FOC, who made the race a club event in terms of spectating, arguably the race would never haver survived.

My own “career” at Monterey started the year after I “finished” the first build of the Siata, in 1986. By then the race weekend was in its 12th year, though it was still a single day affair, on Saturday only. Sunday was still a “track day” for the FOC, along with the Pebble Beach show. There was not much else going on, though my Ferrari was shown at the first “Concours Italiano,” which I think was the year before, only since the FOC had organized the affair and, since they did not have enough cars to fill out the field, begged me to help them out by showing my 2+2, which was generously a “driver” and not a show car. Times have changed indeed.

Over the next decades I was accepted to Monterey over 20 times. In fact I only ended my participation, at my initiative, when Steve was pushed out of running this highly successful and prestigious vintage race weekend, expanded to two full days and one of the climaxes of what had become the “Monterey Week” of high end car affairs on the peninsula.

Over several years I watched my friends win a painting of Ken Miles' two MG specials running through the Del Monte forrest in the early Pebble Beach races. These were given by Steve to the owner of a sub 1500cc displacement car which represented, to him, the best presentation and performance in that class, which in his era had its own race grid. I never won, though my friend and former engine builder Don Baldocchi did...twice. I believe my current builder, Lee Osborn, also won. I had no expectations, but I did have dreams.

Of course such an award was not pre-determined. It could only be judged during the weekend and thus was not “personalized.” No names engraved on the plaque. There were many such awards, some granted by car magazines, or representatives of manufacturers like Ford. In addition, Steve judged and awarded a “group award” to one car and owner in each race...a grant which was a recognition of the group itself as well. While in later times this became an expensive watch...Chopard at first and Rolex later when they took over major sponsorship of the races, but earlier it was a more modest affair.
Monterey Historic Group Award 2001
Third Race on Saturday
And in 2001 Steve called me to the stand on the grass at the old amphitheater where we all met and celebrated at the end of the weekend. Fortunately my friend and fellow Siata racer Gary Winiger managed to snap a couple of photos of me accepting this honor.
I never won any “big” award at Monterey, though there was lots of really nice gifts given to all participants...somewhat of a compensation for risking these valuable cars as well as our own tender bodies in order to make the event a success for the crowd as well as the management. Special entrants shirts and hats, books, small trophies, etc. 

The Wine Country Classic that Steve ran at Sears Point, (originally the Sonoma Classic) never achieved the public success of Monterey. Why is somewhat of a mystery and beyond the scope of this blog. But that does not mean there was not a modest “after party” with its own small awards. One of these was given to a single participant in each race for “Best in Presentation and Performance.” And in 2006 Steve recognized me for Group 1 and Lee for Group 2. his comment was “Must be the day for 750cc” as Lee was racing his one-off and beautifully prepared special, Crosley powered like the Siata.

 The award was a silver cup, and of course since it also was judged in the event itself, is not personally engraved.

The other two awards required evaluation in advance of presentation, as they are personalized. The first is a photograph of the Siata, awarded by Martin Swig's surviving sons, called the “Swig Spirit Award,” given to me at an HMSA event in 2013. This simply knocked me out, as Martin was the perfect gentleman racer. Among other accomplishments he created the concept of the “auto mall” with his dealerships in the “San Francisco auto Center,” was a consultant to the Mille Miglia Storica recreation car rally,
From a display in the MM Museum
Bresica, Italy
Mario Andretti
Willie Brown
Martin Swig
and also created and ran his own version of that event, called the California Mille, as well as other car events such as the “I Hate Football” January 1

The photo was taken by my good friend, pro photographer and graphics designer, Porsche guru, and all-round great guy Llew Kinst...part of what I always called the “Cupertino Mafia” of Ernie Mendicki, Charlie Forge, the “two Garys” (Hubback and Winiger), and both Bill Kinst and son Llew. They were my mentors and friends in many things automotive, either through the Ferrari club, racing, or collecting. I am sure Llew was influential with both Cris Vandagrif of HMSA and Howard and David Swig in selecting me for the honor.
Fantastic Photo
Fanttastic Photographer
And Wonderful Friend (Llew)
and
A Great Honor

The latest award was, in itself, a stunner as well. The last few years have not been kind to my body. From kidney cancer in 2013 through multiple back issues and other surgeries my strength, endurance, and the pain I suffer almost constantly have put a crimp in many things I love to do, not the least of which is work with cars. In fact, just getting ready for my most recent outing, a low key club “season opener” with HMSA at Laguna, was so exhausting, even though spaced over several days, I was at least internally toying with the idea of making the event my “swan song,” at least in terms of trying to do an event other than on a “leave the camper home and arrive and drive” basis. 

I had, of course, mentioned this to no one. I did not want to “get boxed in” by my own words...and I was not at all sure, absent that pain and exhaustion, I was ready to quit. 

And then Cris surprised me. Three years ago, at this same event, he had begun to hand out a beautiful and large crystal trophy at the Driver's meeting on Saturday morning. For the first two years it was given to a single person...a single driver who, in Cris's view, represented the “spirit” of what vintage racing was and should be. 

The first one was given to the son of someone who I have “raced with” for many years. I put that in quotes because Bob Baker was normally in a Porsche 550, a car far beyond the modest capability of the Siata, and Bob is very likely beyond my skill as a driver as well. Bob, like many in the sport, is quite wealthy. At some point, with John Lewis and John Boyle, I got to visit Bob's facility in Reno, and while we were looking for and at a single car being worked on in his extensive workshop by his crew, I did see a board with magnetic labels for each car, and when asked the mechanic said there were 220 cars on the board and in the facility. 

Bob's son Danny is someone I do not know...but presume he, like Adin, has “caught the spirit” and the fever. At least Cris certainly thinks so.

Last year the award went to Stan Anderes. Again, someone who I do not know well but have been “on track” with a number of times. Stan pilots a pristine Lotus 11 and has always driven it well. He also looks like he is truly “older than dirt...” bent and shriveled, and yet a master behind the wheel.

This year, perhaps because they as well as Cris are no longer kids, Cris gave out three of the trophies to various members of his working crew...the only one I honed in on was his now-emeritus Chief Steward. After that he said he wanted to recognize someone who was virtually “invisible,” and in a good way...never causing a fuss or trouble and always driving well. I was pleased when he called up Don Baldocchi, as Don is not only a close friend and former engine builder who taught me a lot, he is also past 80 and completely deserves this recognition.

And then...

Cris said there was someone else in exactly the same category...and he called my name. I was more than mildly surprised. When I took it from his hands and thanked him, it was as if he had read my thoughts about calling it quits.

“Now that I've done this,” he whispered to me, “you have to stay in it for a few more years.” 

“Maybe a new venue?” I said. “Maybe Mont Tremblant next year.” 

“Much better than France” he said, knowing I had been planning a trip to Provence for May (now knocked out by the coronavirus pandemic).

I'm not exactly Peter Giddings. I don't have many magnificent cars, nor have I driven magnificently all over the world. And I am in no way jealous of or saying Peter did not deserve every picture and accolade he ever received. He was truly a magnificent man and I was so lucky to count him as a friend. But I have also been equally lucky to be able to do the things I have with cars, and to have these measures of respect from people who are, themselves, very special in this wonderful world of things automotive.